Any questions

We are happy to help!

Question about Gecko Booking?

If you are unsure whether Gecko Booking is right for you, or if you have other questions, we would love to hear from you!

All good!
Please enter your name.
All good!
Please enter your email.
All good!
All good!
Please enter your question.

Fields marked with an * are required

Guides - General settings

General settings

Under 'General settings' you can change a number of settings of the Gift Voucher Add-On. The settings are changed by ticking (the feature is activated) or unticking (the feature is disabled) the box opposite the setting you want to change. Afterwards, press ‘Update'.

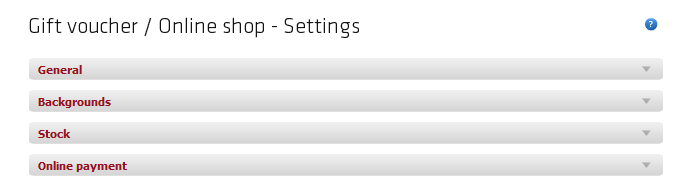
By pressing the arrow in the grey bar, you can see and change all settings in the chosen category.


Under 'General' you can change the following general settings:

  • Vouchers valid for: You can determine the standard validity period of vouchers. It is possible to set a different validity period on the individual voucher (See Edit specific voucher for more information).
  • Allow customer-determined value?: You can determine whether to allow customers to purchase gift vouchers of which the customer him/herself can determine the value. You can determine the minimum value of the gift vouchers and which item number gift vouchers with a customer-determined value should have. This feature is activated by default.
  • Show 'Name of recipient' space?: You can determine whether customers should be allowed to enter the name of recipient of the voucher. This feature is activated by default.
  • Show "Greeting" space?: You can determine whether customers should be allowed to enter a greeting for the recipient of the voucher. In addition, you can determine how long this greeting can be. If this feature is activated, it is possible to write a greeting when a voucher is purchased online, when a voucher is purchased in the cash register, and when a voucher is created via 'Create voucher'.

Please note! In order for a recipient greeting to be shown on the voucher itself, you must in addition to activating the feature 'Show "Greeting" space?', insert the 'greeting feature' in the relevant voucher texts. This is done by using substitution codes (See Substitution codes for more information about how substitution codes work). If you want the greeting to be shown on self-print vouchers, you must insert the substitution code [gavekortHilsen] in the texts 1) 'Gift voucher / Online Shop - Print - Pdf - Discount voucher', 2) 'Gift voucher / Online Shop - Print - PDF - Gift voucher', 3) 'Gift voucher / Online Shop - Print - Pdf - Gift voucher - With value', 4) 'Gift voucher / Online Shop - Print - Pdf - MultiPass voucher', and 5) 'Gift voucher / Online Shop - Print - Pdf - Subscription'. If you want to include the greeting on the voucher receipts that can be printed when the voucher is purchased in the cash register, you must insert the substitution code [TILHILSEN] in the texts 1) 'Gift voucher / Online Shop - Print - Receipt - Discount voucher', 2) 'Gift voucher / Online Shop - Print - Receipt - Gift voucher', 3) 'Gift voucher / Online Shop - Print - Receipt - Gift voucher - Value', 4) 'Gift voucher / Online Shop - Print - Receipt - MultiPass voucher', and 5) 'Gift voucher / Online Shop - Print - Receipt - Subscription'. These texts can be accessed under the menu item 'Settings' -> 'Texts' (See Texts for more information).


  • Show message space?: You can determine whether customers should be allowed to write a message/remark when purchasing a voucher. This feature is activated by default.
  • Show mini basket: By activating this, your customers will be able to see a basket of their purchases and the total amount.
  • Require terms approved: Here you can activate that the customer must accept your terms and conditions, in order to complete a purchase in the mini shop.
  • Activate self-print voucher?: You have the option of activating the use of self-print vouchers. Self-print vouchers enable your customers to print their vouchers immediately after purchasing them online. In addition, the customer will receive an e-mail with a link to the voucher. This way, your customers can order and pay for a voucher online and shortly hereafter give this voucher as a gift. Please note that the use of self-print vouchers requires the purchase of online payment (See the guide Online Payment Add-On for more information). If you want to transform an already created voucher into a self-print voucher, this can be done when viewing the specific voucher (See Edit specific voucher for more information). By ticking the box ‘Only self-print?', the e-mail containing the link will be sent to the customer automatically when (s)he purchases the voucher online. Vouchers created in the cash register system and using the Gift Voucher Add-On are also created as self-print vouchers.

Please note! When a voucher is created by staff, the e-mail containing the link to the self-print voucher is not automatically sent to the customer. This must be done manually (See Edit specific voucher for more information).


  • Show value/balance on self-print vouchers: You can determine whether the value/balance should be shown on self-print vouchers. This could be used if you sell gift vouchers for particular services where the giver of a voucher does not want the recipient to see the price of the gift voucher. Please note that vouchers with a customer-determined value always show the value/balance regardless of whether this feature has been activated or not. In order for the value/balance to be shown on the voucher, the text Gift Voucher / Online shop - Print - Pdf - Gift voucher - With value, that you find under 'Settings' -> Texts' -> 'Vouchers'. 
  • Add pass(es): You can determine whether it should be possible to add passes to an existing MultiPass voucher, i.e. add passes to a customer's MultiPass voucher.
  • Edit voucher code: You can determine whether it should be possible to edit the voucher code that is automatically assigned to your vouchers.
  • Types - Gift voucher, MultiPass voucher, discount voucher, and subscription: You can determine when VAT should be paid. In most cases it is recommended that you put a tick in 'Record as revenue at purchase of voucher'. In this way, the potential VAT will first be calculated when the sale has actually happened (when the customer uses the voucher).
  • Show original item price: If this box is ticked, the original item price will be displayed, instead of the voucher's pass value, in the online order list, when a voucher payment occurs.  By default the pass value is displayed, not the item price.

Remember to press 'Update settings' in order to save any changes!


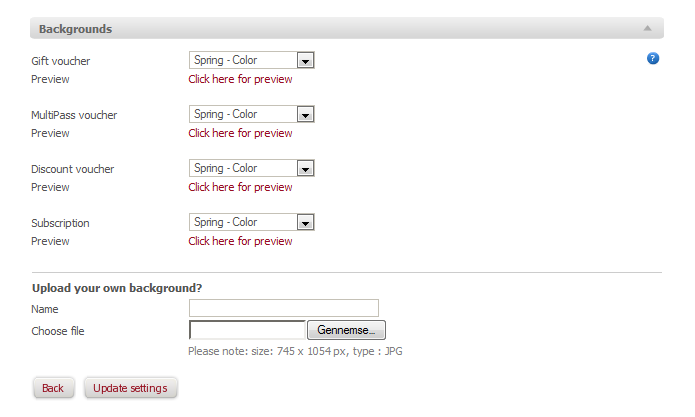
Under 'Backgrounds' you can change settings the affect the background of your vouchers, i.e. the design of the vouchers. You have the following options:

  • Gift voucher, MultiPass voucher, discount voucher, and subscription: You can determine which backgrounds should be used on your vouchers. This background can be seen when the vouchers are printed as self-print vouchers. Several predefined backgrounds exist, and by pressing ‘Click here for preview' you can see how the vouchers will look with the chosen background. Under ‘Upload your own background' you have the option of uploading your own background. Enter a name of the background, choose a file, and press ‘Update settings'. Your background can now be chosen above. Please note that the file you upload must have a size of 745 x 1054 px and be of the type JPG. You can change the text of your vouchers under ‘Texts' under the menu item ‘Settings' (See the guide Main guide for more).

Remember to press 'Update settings' in order to save any changes!


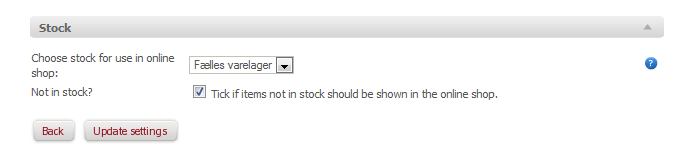
Under 'Stock' you can change the following stock settings:

  • Choose stock for use in online shop: If you have multiple cash registers and therefore have created multiple stocks, you can choose which cash register and thereby which stock should be used in the online shop.
  • Not in stock?: You can determine whether items not in stock should be shown in the online shop.

Remember to press 'Update stock settings' in order to save any changes!

Please note that the use of a stock requires the purchase of the Cash Register Add-On (See the guide Cash Register Add-On for more information).


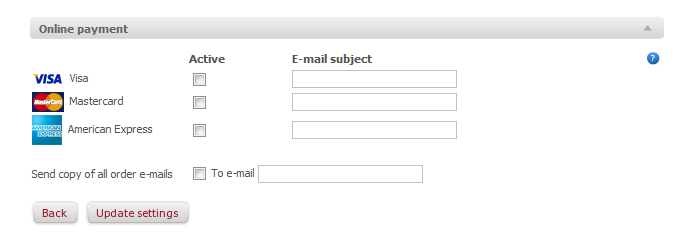
Under 'Online payment' you can change the following payment settings:

  • Online payment: You can determine which types of payment should be active in the online shop and therefore which types of payment can be used to pay for vouchers. If a payment type is active, it can be used in the online shop. Please note that this requires the purchase of online payment (See the guide Online Payment Add-On for more information). You also have the option of entering the subject of the order confirmation e-mails sent to customers. It is important that you enter a subject when you activate a type of payment, as e-mails will be sent without a subject if none is entered. You can change the text of the e-mail under ‘Texts' under the menu item ‘Settings' (See the guide Main guide for more information).
  • Send copy of all order e-mails: You have the option of receiving a copy of all order e-mails on an e-mail address of your choosing.

Remember to press 'Update payment types' in order to save any changes!


Try a Free and Non-Binding Demo of Gecko Booking & Administration

Fill out the form, and you will receive a demo as soon as possible.

All good!
Please enter the company name.
All good!
Please enter your phone number.
All good!
Please enter your name.

Fields marked with an * are required